Keeping up with kitchen mess is a monotonous yet necessary chore. But going beyond the daily tidying and really diving into a deep clean takes planning, effort and elbow grease. If you’re ready to make your kitchen truly sparkle, follow these steps toward a major cleanse.
Be Forewarned: This Is Going to Get Ugly.
You’ll see things that might turn your stomach — dust, grease, grime, maybe even mold. You’ll be unpacking all your out-of-sight, out-of-mind contents from cabinets and heaping them onto your countertops — which initially may seem counterproductive.
This will also be time consuming. Plan accordingly. Allow yourself a few — or several — hours during kitchen downtime.
It will be worth it. We promise you.
Ready.
Prepare yourself by taking a gander at your orderly, clutter-free kitchen. (In other words — study your space after you’ve completed your everyday cleaning.) Look at the surfaces and then look beyond: over, under, behind. You might be mortified to see the dust and grime that has accumulated on top of your refrigerator, or even worse: underneath your refrigerator and stove. But knowing what you’re in for will better prepare you for the process. Tip: You might want to take a good look at different times of the day as changes in lighting can hide or spotlight dust and dirt in certain areas.
Set.
Now that you have seen what you’re up against, begin to gather your cleaning supplies. Here are some suggestions:
- Surface cleaner
- Disinfectant spray
- Empty boxes for purging items
- Oven cleaner
- Floor cleaner
- Wood polish
- Granite/Quartz polish
- Stainless steel polish
- Cleaning toothbrush
- Sponges
- Vinegar
- Baking soda
- Paper towels
Go.
You’ll proceed from the inside out, and then from the upside down.
1. Pantry
This is the part where disorder ensues. Take all food out of your cabinets and pantry and place it on countertops. Check labels and toss any items that have expired. Fill an empty box with items that you know you won’t eat before the expiration date; this box of food can be donated to a local food pantry.
Wipe down the insides of all the shelves with soapy water or kitchen cleaner.
When returning items to shelves, arrange like items together, and put the oldest items in the front and newest in the back.

2. Refrigerator
Next, tackle the refrigerator and freezer. Again, take all the food out and place it on the counter. Check labels and toss any items that have expired or are moldy.
Wipe down shelves with soapy water or kitchen cleaner. Remove and wash produce drawers. Return food, placing similar items together.
Remove all excess magnets and unnecessary papers from the exterior of the refrigerator. Clean and polish the exterior.
Next, unplug your refrigerator/freezer and shimmy it (carefully) away from the wall. You may need a buddy to help with this step. Locate the coils on the back of the refrigerator (depending on the model) and vacuum using the brush attachment on your vacuum cleaner hose. (This will lengthen the life of your refrigerator, so make sure to tackle this a few times per year.) Vacuum and mop the dirt and grime that has accumulated underneath the refrigerator.
Don’t forget to plug it back in!
3. Cabinets
Take all your items out of your remaining cabinets and drawers and place them on your counter.
Wipe down all the shelves and drawers with soapy water or kitchen cleaner. Make sure to take out removable drawer organizers and wash those as well.
Reorganize while putting items away. When reorganizing your cupboards, place dishes and serving pieces that are used the least on top shelves and everyday items within easier reach.
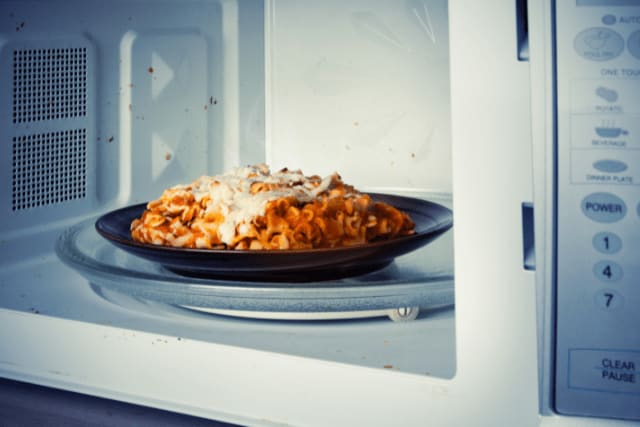
4. Microwave
Wipe down your microwave inside and out. To loosen grime before scrubbing the inside of the microwave, microwave a (microwavable) bowl of water and vinegar to create a steaming solution. If your microwave smells, you can add a tablespoon of baking soda to the mixture to absorb the smells as the solution heats up. Wait several minutes before opening the microwave door so that the steam can adequately loosen the dried food and grime. While you scrub the inside of the microwave using the cleaning solution you created and heated, take out the glass turntable and soak in hot soapy water. Wipe down the now clean inside with a dry cloth or paper towel. Return the clean turntable. Tip! Check to see if your turntable is dishwasher safe and throw it in there every once in a while.
5. Oven
To clean your oven, first remove the racks and soak/scrub them. Then follow the manufacturer’s instructions regarding a self-cleaning cycle for the rest of the oven. For future messy baking projects, place a baking sheet on the bottom of the oven to catch messes. This will help keep your oven cleaner longer.
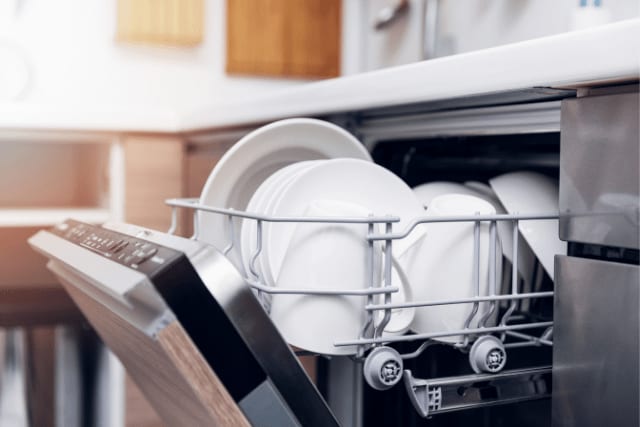
6. Dishwasher
You may not think the inside of your dishwasher needs to be cleaned, but a gunky mixture of food, grease and detergent can get caught in the filter. Unscrew the filter and scrub it with a toothbrush before screwing it back on. You can also buy powerful deep cleaning pods that will dissolve grime.
7. Surfaces
Once the insides of cabinets, drawers and appliances have been cleaned, it’s time to tackle the surfaces. Start at the top and work your way down. This way falling debris will get cleaned in the next step. Look up — clean light fixtures first, then the tops of cabinets and your refrigerator. Next, polish cabinets. Thoroughly cleaning countertops requires removing everything that’s on them. Be selective when placing items back on the counter. Streamline for easier cleaning in the future — and for a cleaner, less-cluttered look overall.
8. Floors
Finally, tackle floors. You can probably clean underneath the oven by removing the storage drawer.
Last step
Grab a cold beverage from your sparkly clean refrigerator and enjoy the fruits of your labor!